Showing posts with label 3D item. Show all posts

Tuesday, November 30, 2010

Thankful For You Project

I thought I'd share one last Thanksgiving-related project as the month comes to a close. I made this little paint can as a way for us to remember the meaning of the holiday. I plan to bring it out each year, and family members can write a gratitude on small pieces of paper throughout the month and place them in the can. Then we can spend some time reading them together on Thanksgiving.


Supplies:
clear paint can
chipboard
Top Note die/ Die cut machine
Prima flowers
Glimmer Mist
Creative Memories alphas
AC Thickers alphas
Stickles
misc. ribbon

Monday, October 25, 2010

Alphabet Block Halloween Craft from Rook No. 17!

I am so excited and honored to be featured here at Reflections...on Living Creatively!  I'm grateful to Bekah for giving me the opportunity to do my very first guest post!  


Oh, now wherever shall I begin?

Perhaps introductions are in order?


I'm Jenn, and I'm the "bird" behind  the creative living blog Rook No. 17.  I draw on my experiences as a mother, chocolatier and pastry artist, teacher and lifelong crafter to share original crafts, recipes and ideas for making every day special.  I hope you'll drop by some time and say 'hi'!  You're sure to find something yummy, quirky, curious, crafty, or inspiring!  


Today I'm pleased to share with you one of the Halloween crafts I put together for my "Virtual Halloween Open House" this year.  It was inspired by my love for vintage toys and indulges my weakness for glitter!  


This A-B-C block set is an inexpensive & versatile craft that you can adapt for other holidays and purposes.  A pastel palette and some whimsical children's book illustrations would yield some charming decorations for a nursery!  If black birds aren't your bag, you can top the blocks with any sort of vintage style Halloween knickknack to suit your taste.  


HALLOWEEN ALPHABET BLOCKS


Materials:


3 2x2 Wood Blocks (purchased from craft store for approx. $1/ea)


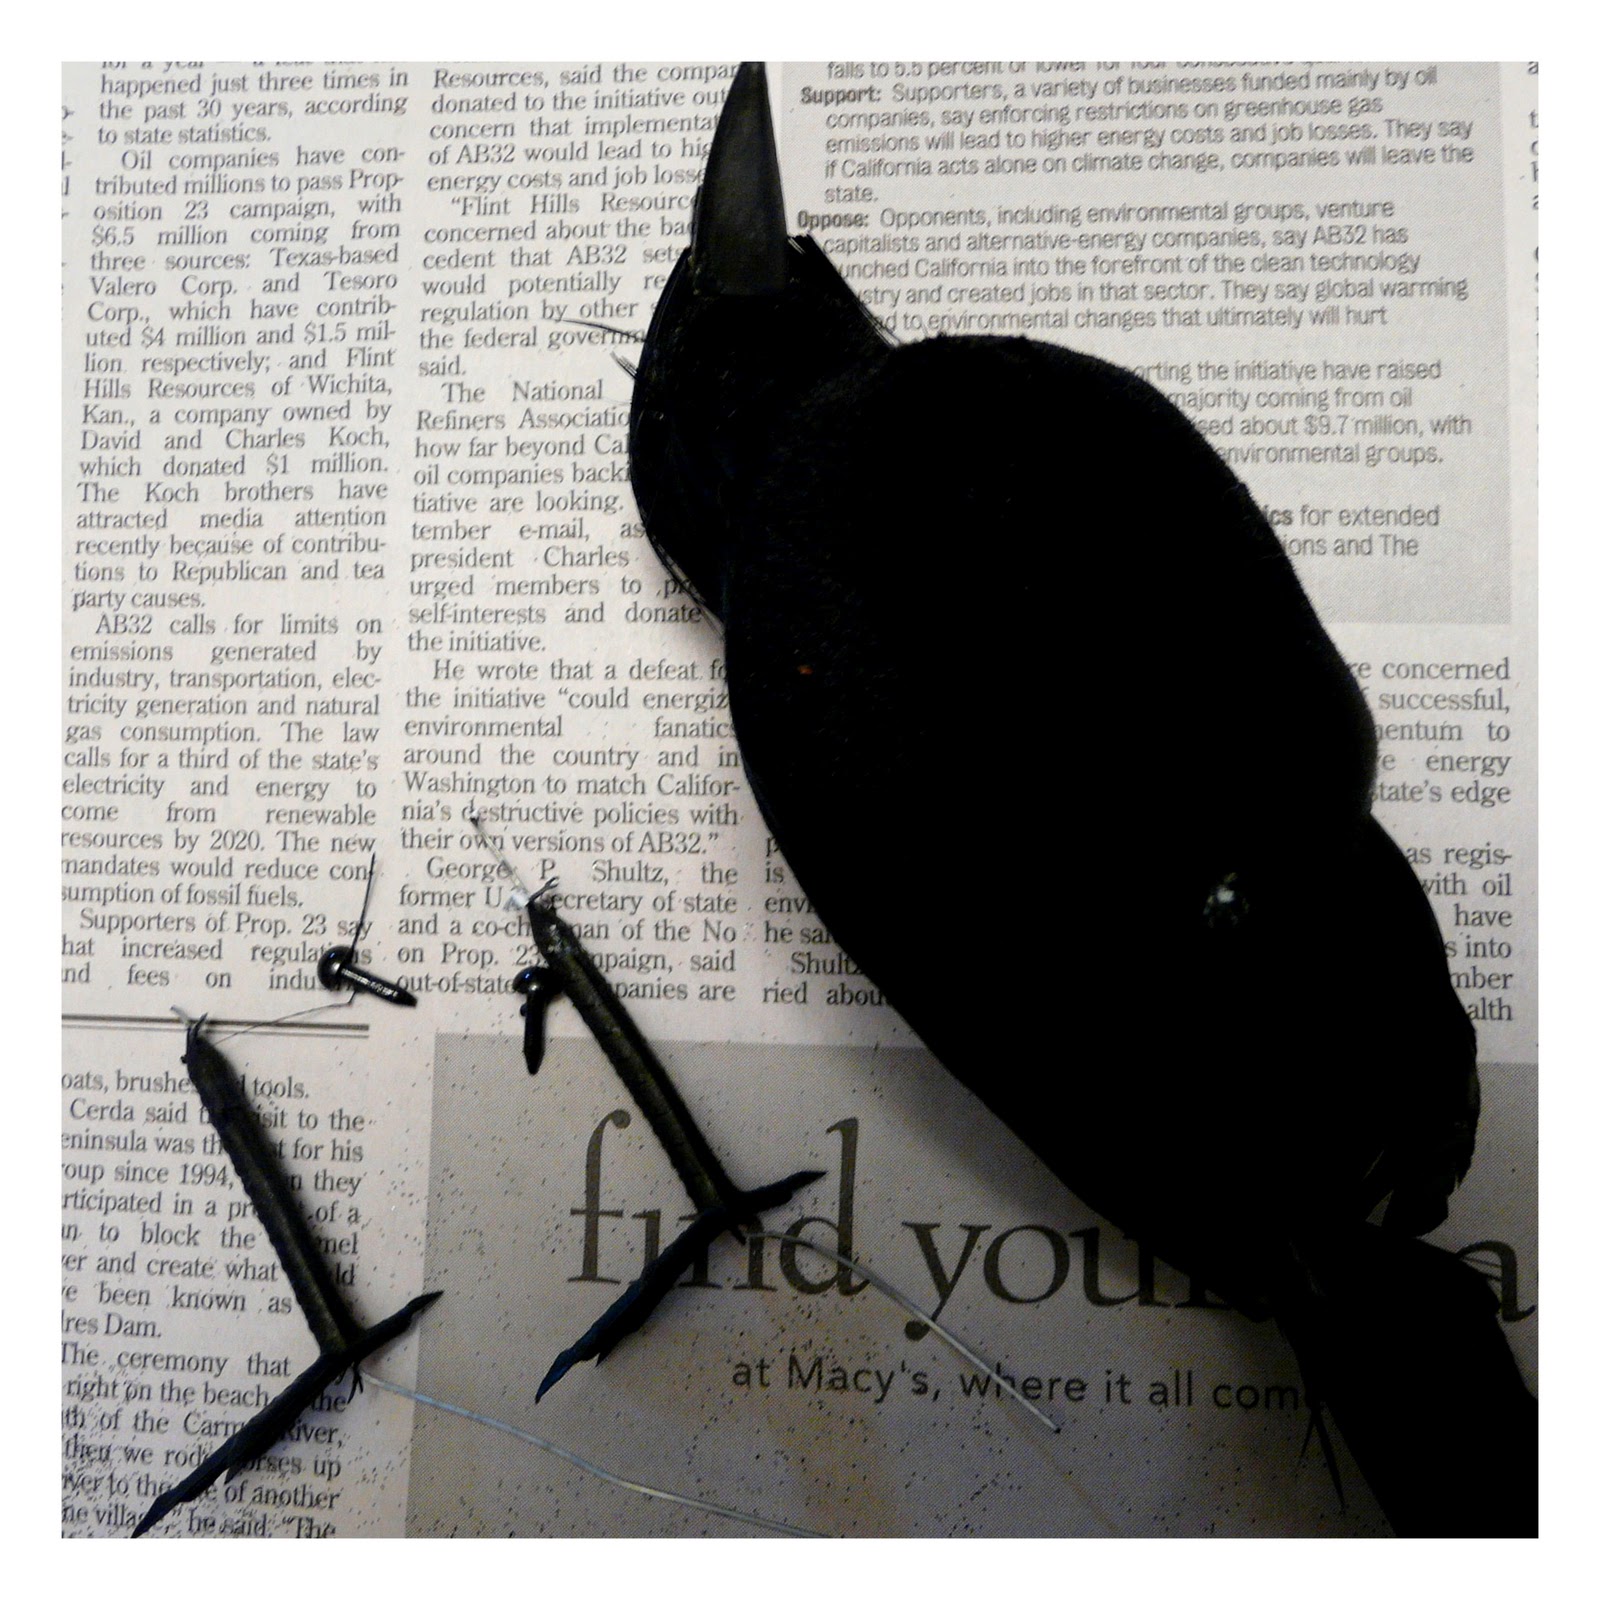
3 Faux Crows (Dollar Tree Stores)


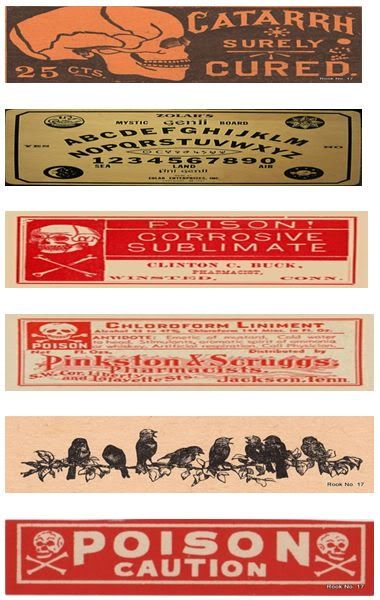
Printed Images (1.7x1.7)  ~ I've included a free download below


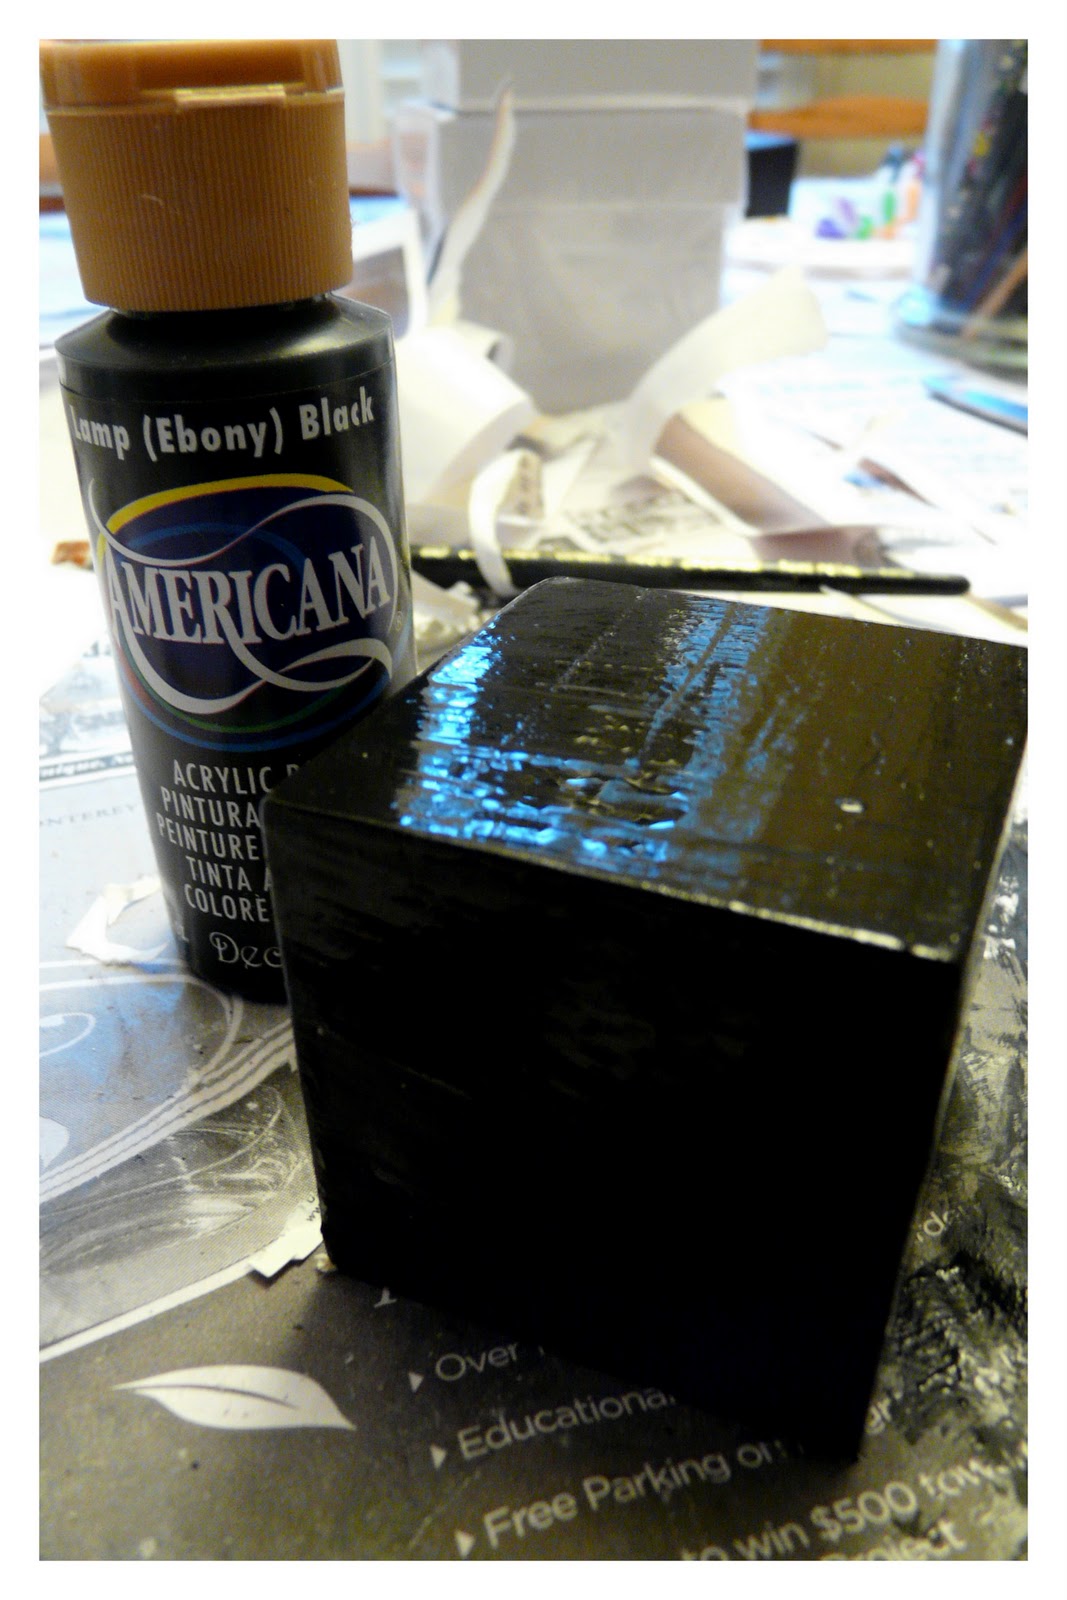
Black Paint ~ I like DecoArt Americana "Black/Ebony"


Fine Sand Paper or sanding block


Matte Mod Podge


Glitter ~ I used PK Glitz "Glitter Glitz" in Black


Wooden Spools (salvage or craft store)


Mask download (see below)


Hat Band download (see below)


Scrap Paper or old book pages (for hat embellishment)


Hot glue gun


Step 1:  With a piece of sand paper or a sanding pad, sand block to remove any rough surfaces/edges.


Step 2:  Paint entire block.  Dry.


Step 3:  When block is dry, sand corners and edges to give an aged look.


Step 4:  Apply Mod Podge to the back of printed image (free download below).  Affix image to block.  Dry.  Repeat for all 6 sides.  You may seal the blocks if you wish.  I chose to leave mine unsealed because I felt that it was more consistent with the look of the vintage alphabet blocks I've seen in antique stores.  


Step 5:  Remove plastic legs and eyes from the bird.  Didn't know you were going to be learning a little taxidermy today, did ya?


 Step 6:  Paint the spools black.


Step 7:  Mod Podge the back side of the printed hat bands, then wrap around spools.  Cut a small circle (a little less than the diameter of the top of the hat) out of scrap paper and affix with Mod Podge.


Vintage_Scrap_Bands.jpg Vintage Scrap Bands picture by sarahjmorriss


(Click the image above to download a printable .jpg)


Step 8:  Using a hot glue gun, affix bird to the block and hat to the bird.


Step 9:  Brush Mod Podge on to the head, back and wings of the bird (everywhere that there are feathers).  Dust with black glitter.


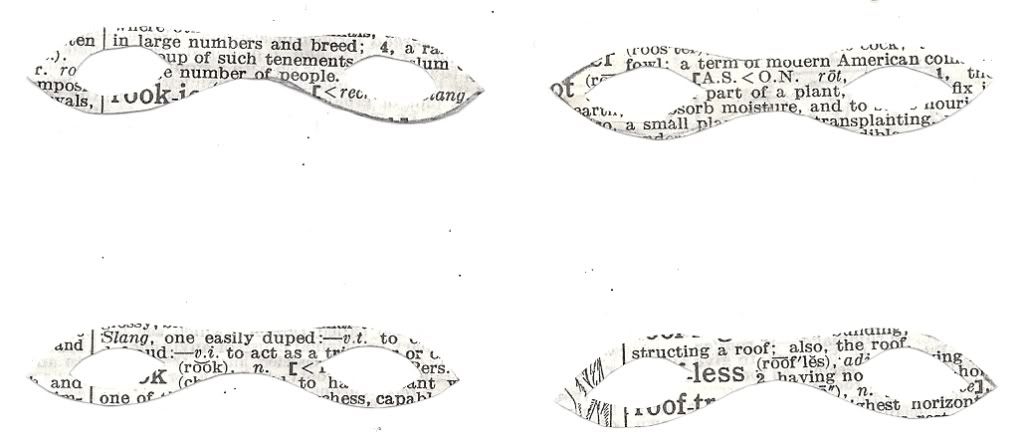
Step 10:  Cut out mask and attach with glue.  I did not put the plastic eyes back in.  The plastic seemed to take away from the vintage look of the piece.  


Scan_Pic0094.jpg Mini Masquerade Masks picture by sarahjmorriss


(Click the image above to get a printable jpg of the masks)


Here is a free download of images you can use for the blocks:


ABC Block Images


Enhanced by Zemanta

Wednesday, May 19, 2010

Teacher Appreciation gift with Lindsay's Stamp Stuff

I can't believe my daughter's last day of school is Monday! She has had a great teacher this year, so I made her a little something to say "thanks".


Supplies:
Stamps- Lindsay's Stamp Stuff School Papers and School Rules!
Ink- Tim Holtz Distress Ink; Sharpies
misc. ribbon
misc. buttons
gift bag filler colored with Glimmer Mist
foam adhesive
dowel rod
flower arrangement foam (in the bottom of the bucket)

I love challenges! This project qualifies for the following:
"Anything Goes" - Dare U 2 Digi Stamp
"Anything but a card" - One Stitch at a Time
"Use 5 buttons" -  Craft Your Passion

Be sure to stop by Lindsay's blog for a freebie and links to the other DT members' projects.
Check out her mygrafico store to see and purchase all her digi goodies!

Wednesday, April 14, 2010

Saving for a Rainy Day!

Hi everyone! I'm Bekah from Reflections...on Living Creatively. I live in Ohio in the US with my husband and two lively daughters. When I'm not working as a parent coach to families with disabled children, I can be found playing with my kids, reading, or crafting!

I'm very excited to share my bank tutorial with you here at Mummy Crafts.

 I made a bank for my daughter using a baby formula can. I have attempted to show you step by step how I created it. While this was an easy project, there is drying time between each step, so this is not super-quick.

Step 1: Choose your container and remove the label.

Step 2: Apply a thick coat of gesso. Let dry. This covers up any seams in the can and allows the surface to accept paint.

Step 3: Paint with acrylic paint of your choice. I thinned out light blue paint with just a little water.

Step 4: While the paint is still wet, remove small areas with a baby wipe to simulate clouds. Let dry.

Step 5: Select a darker shade of paint and water it down significantly. Then flick and splatter the paint randomly on your can. I created the large "drops" by loading up my paintbrush and squeezing it against the can, then letting the paint run down. Let dry.

Step 6: Print desired images on watercolor paper and paint. Cut out and adhere to can. Here I used Puddle Fun from Lindsay's Stamp Stuff.

Step 7: Adhere letter stickers.

Step 8: Fasten a label holder to the lid and cut out the center.

Step 9: Finish with a couple of coats of acrylic sealer.

I hope you enjoyed the tutorial! Please stop by and see what I have to offer... scrapbooking, book reviews, recipes, and photos!

Tuesday, April 13, 2010

Welcome to the LSS Blog Hop!


Welcome to your final stop on today's blog hop for Lindsay's Stamp Stuff! I hope you've enjoyed all the great projects today. If you didn't arrive here from Karin's blog, be sure to go back to the beginning at Lindsay's blog.

To celebrate the company's first anniversary, I am giving away this set!


To enter, simply leave a comment on my post today. Easy, huh?
For a second chance to win, grab the button below and post on your blog, then post here with a link. By the way, every stop on the hop for each of the three days has a give-a-way! You have until Monday, April 19th to enter. Winners will be notified on Tuesday.


Here is a triangle treat box I made for my niece's first birthday using the Pretty Primative set:

I printed the images on watercolor paper then used watercolor pencils and an aqua brush to color. I love this look!

Make sure to stop by mygrafico for our 3-day virtual crop. There will be challenges and daily freebies! After registering with mygrafico, join the crop room for all the fun!

Every stamp in Lindsay's store is 50% off during the celebration.
Hope to see you there! Be sure to visit Lindsay tomorrow for day 2 of the hop!

Tuesday, February 2, 2010

Design Team announcement!

I am happy to announce that I will be a guest designer for Lindsay's Stamp Stuff this month. Lindsay's Stamp Stuff is a digital stamp and paper company... cute and whimsical designs. Here is a little peak at what I have created using Lindsay's designs...

A package topper!

Here's a close-up of the layered lily stamp I watercolored, cut out, and layered.

Check back on Thursday for a scrapbook page and freebie!

Friday, September 11, 2009

Le Chic Friends with Flair!

Welcome to Unity's Friends with Flair Friday!
Today I am showcasing the new Le Chic Vintage set...


This first project is a jumbo clothespin/picture holder.
Supplies: clip (OTC); acrylic paint; paper (CM); ink (Chocolate Chip & Certainly Celery); stamps (Unity- Le Chic Vintage)

The second project is a scrapbook layout from Father's Day. Layout inspired by July '09 Creating Keepsakes magazine.
Supplies: red & brown cs; acrylic paint; Unity Burnt Umber ink; mesh (unk); Thickers; staples; stamps (Unity- Le Chic Vintage)
Thanks for looking, and have a great weekend!
PS- sorry for the photo quality- shooting late at night!

Tuesday, August 11, 2009

Altered fencepost

I think this is finished. Maybe it needs something at the top? Anyway, this little wall hanging started life as a fencepost. After cutting off the top and sanding it down, I painted it with gray and white acrylic paint. The background paper is from an old dictionary, if you look close the definition for "twinkle" is at the top! I stamped Print Pattern in VersaMark and embossed with UTEE, then went over the whole thing with Peeled Paint distress ink. It is adhered with Modge Podge. The sentiment (from Unity) was stamped in Going Gray on a scrap. I hand-cut the stars from chipboard (ok, a cereal box!) and embossed them with silver EP. Very shiny in real life, a nice contrast to the otherwise weathered look, I think. The star at the bottom is popped up with foam adhesive. Some garage-sale ribbon, and done! Please let me know what you think!

Supplies:
paper: dictionary, scraps
ink: Peeled Paint (Tim Holtz), Going Gray (SU), VersaMark
stamp: Print Pattern (SU), Birdie Inspriation (Unity)
other: UTEE, silver EP, ribbon, Modge Podge, foam adhesive
Posted by Picasa

Thursday, August 6, 2009

It's a....


Just a little peek at a project I'm working on. Can you guess what it is? It's a... fencepost!


I am going to layer it up with some paint and paper, and I think I'm going to turn it into a little wall hanging with an inspirational quote or something. I have a few more of these in the backyard, so maybe I'll do a series!


Monday, May 11, 2009

Embossing with Pearl-Ex


I have been wanting to try embossing with Pearl-Ex, so this weekend I printed out the tutorial from SCS (Love those!) as well as the one for a 2-5-7-10 box, and got to work! First I scored the cardstock according to directions and stamped Baroque Motifs in VersaMark. The square panel and focal medallion use the embossing technique- stamp in VersaMark and emboss with clear EP. While it is still warm, rub Pearl-Ex over it and heat again. Wipe off the excess, and you're done! What do you think?
Posted by Picasa

Monday, March 23, 2009

Easter goodies!


Here is a little Easter treat bag topper I made for my daughters and nieces. I started with some peachy-colored cardstock, cut with my Top Note die and folded in half. The bunny stamp is from Oriental Trading Co. The bunny and sentiment (SU's One of a Kind) are stamped in Chocolate Chip. The flowers are stamped in Pumpkin Pie. I used the CM custom cutting system and Nesties to cut the circles, with $1 bin ribbon behind them. All paper edges were sponged with either Chocolate Chip or Pumpkin Pie ink. To finish off the project, I added orange rhinestones from Studio 18 in the flower centers. Thanks for looking!